Home page for Ravitz Chess
Notes |
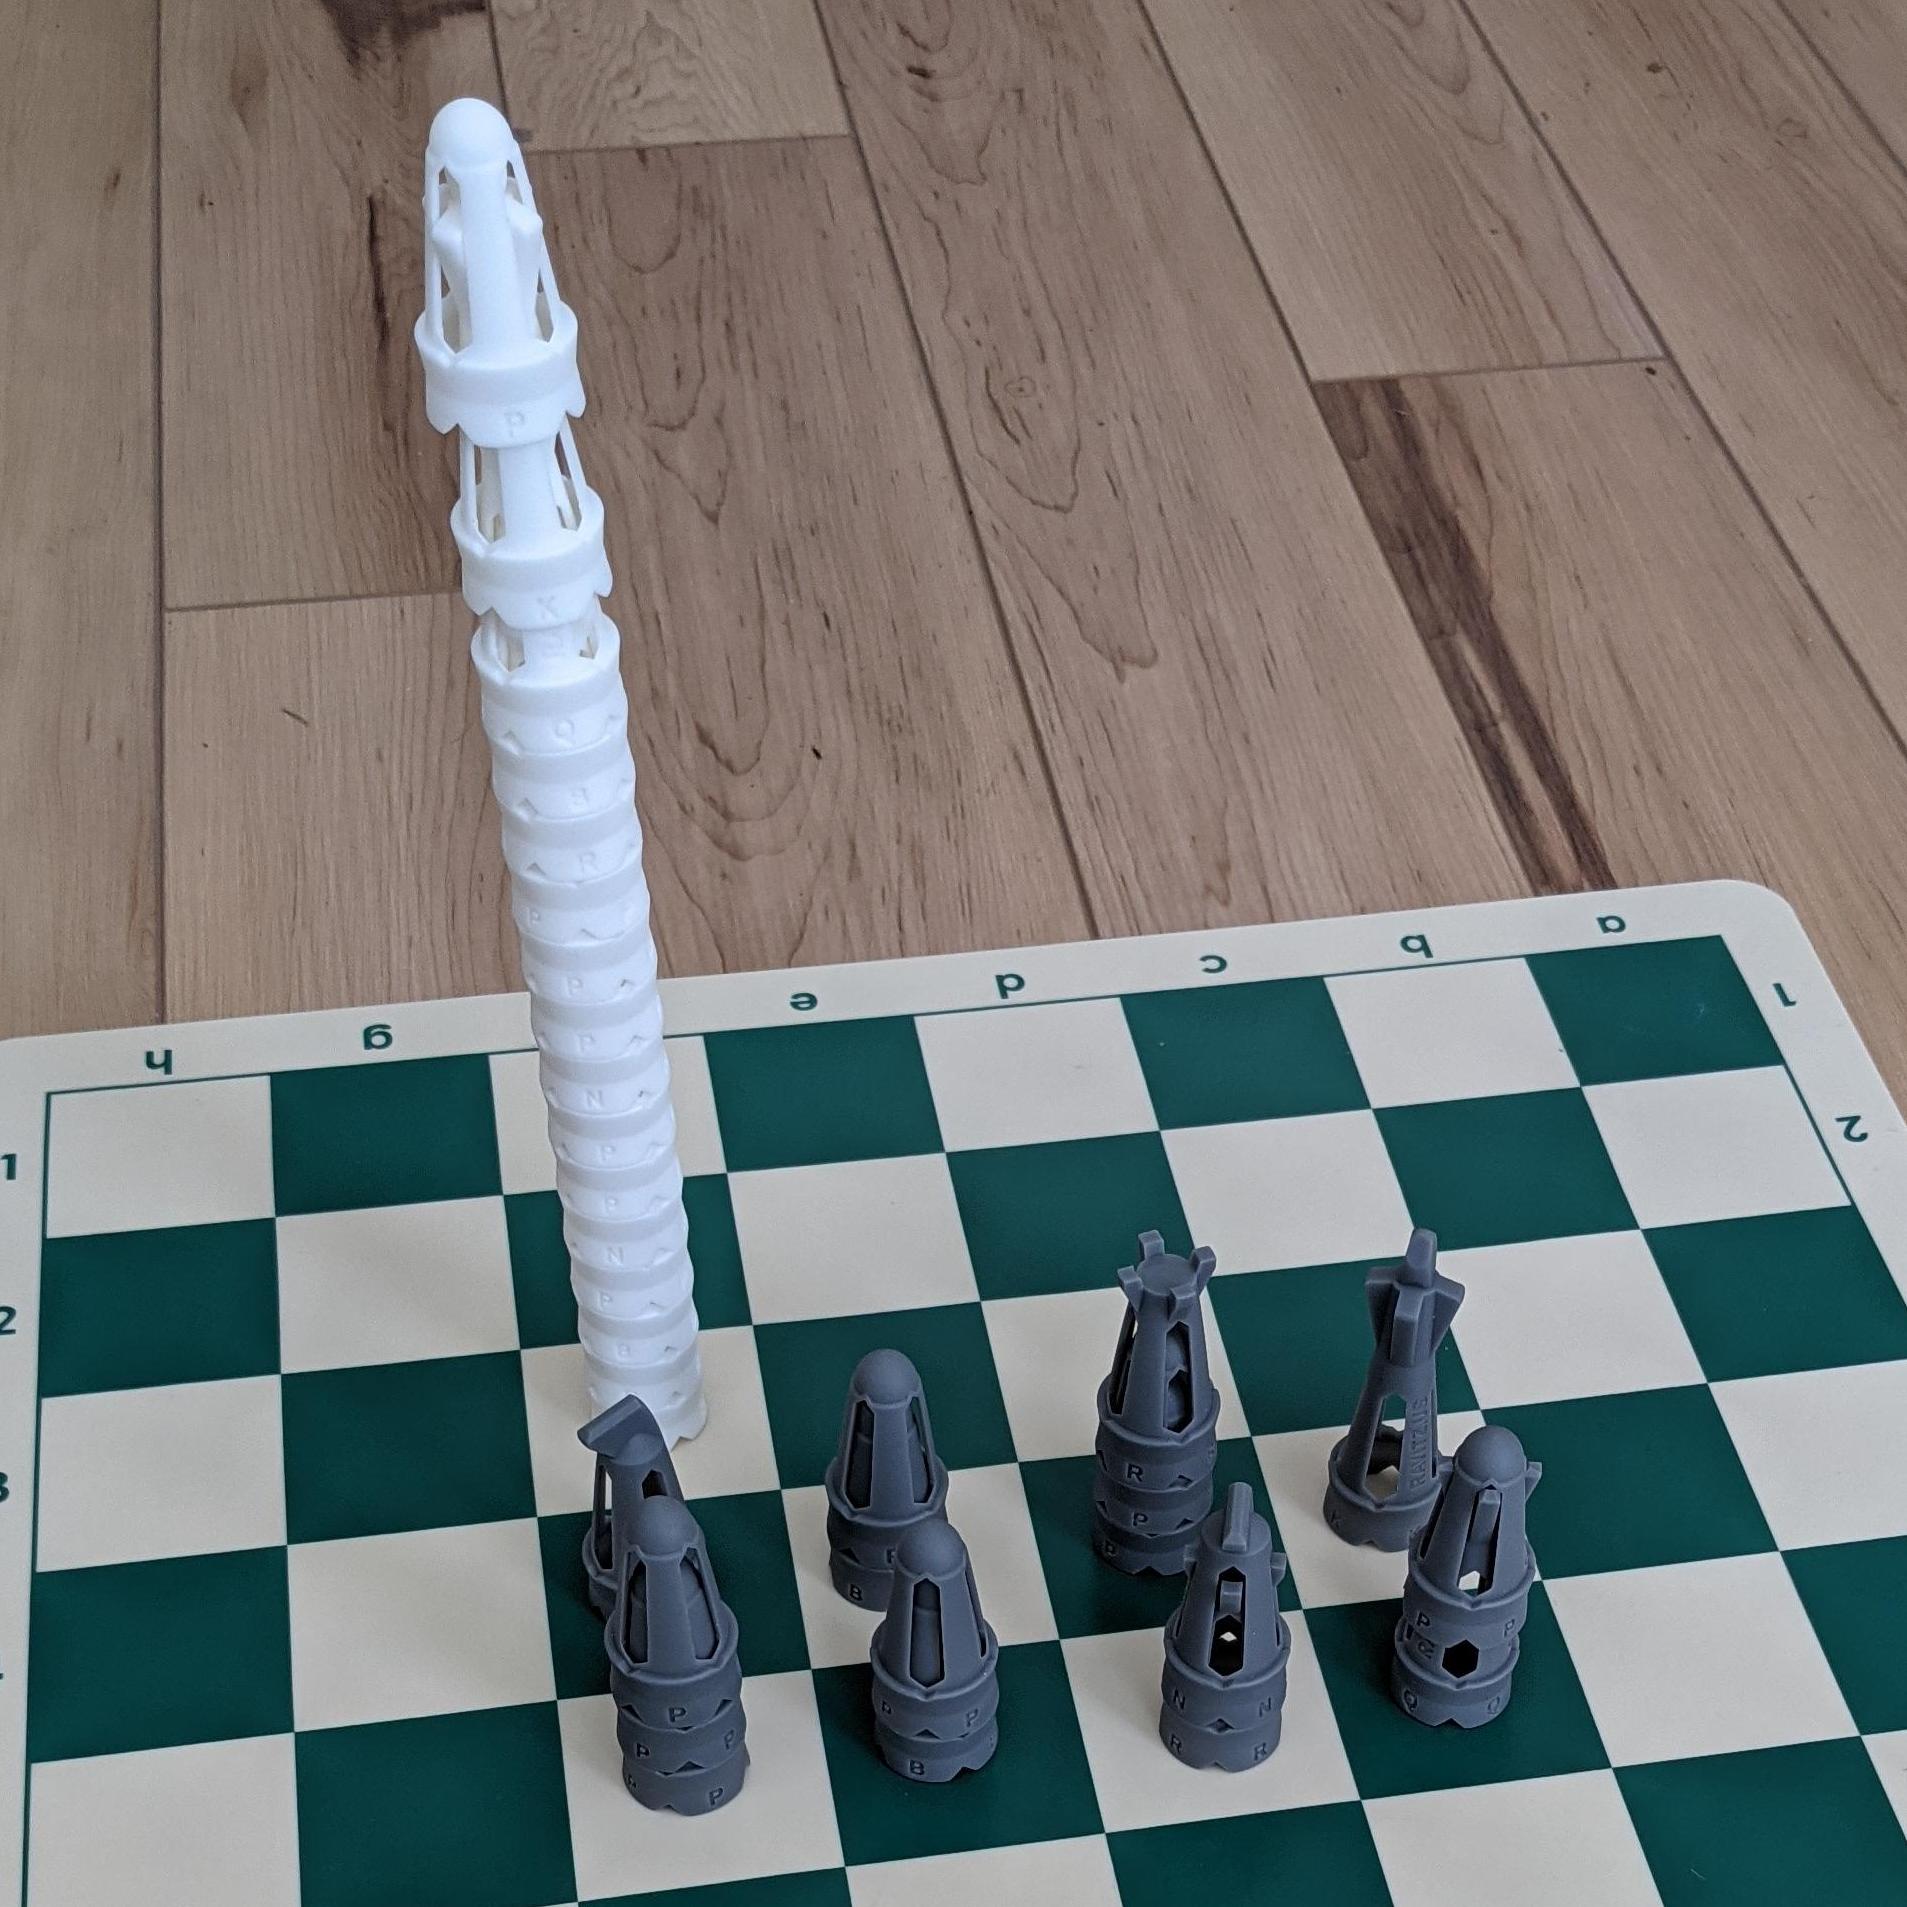
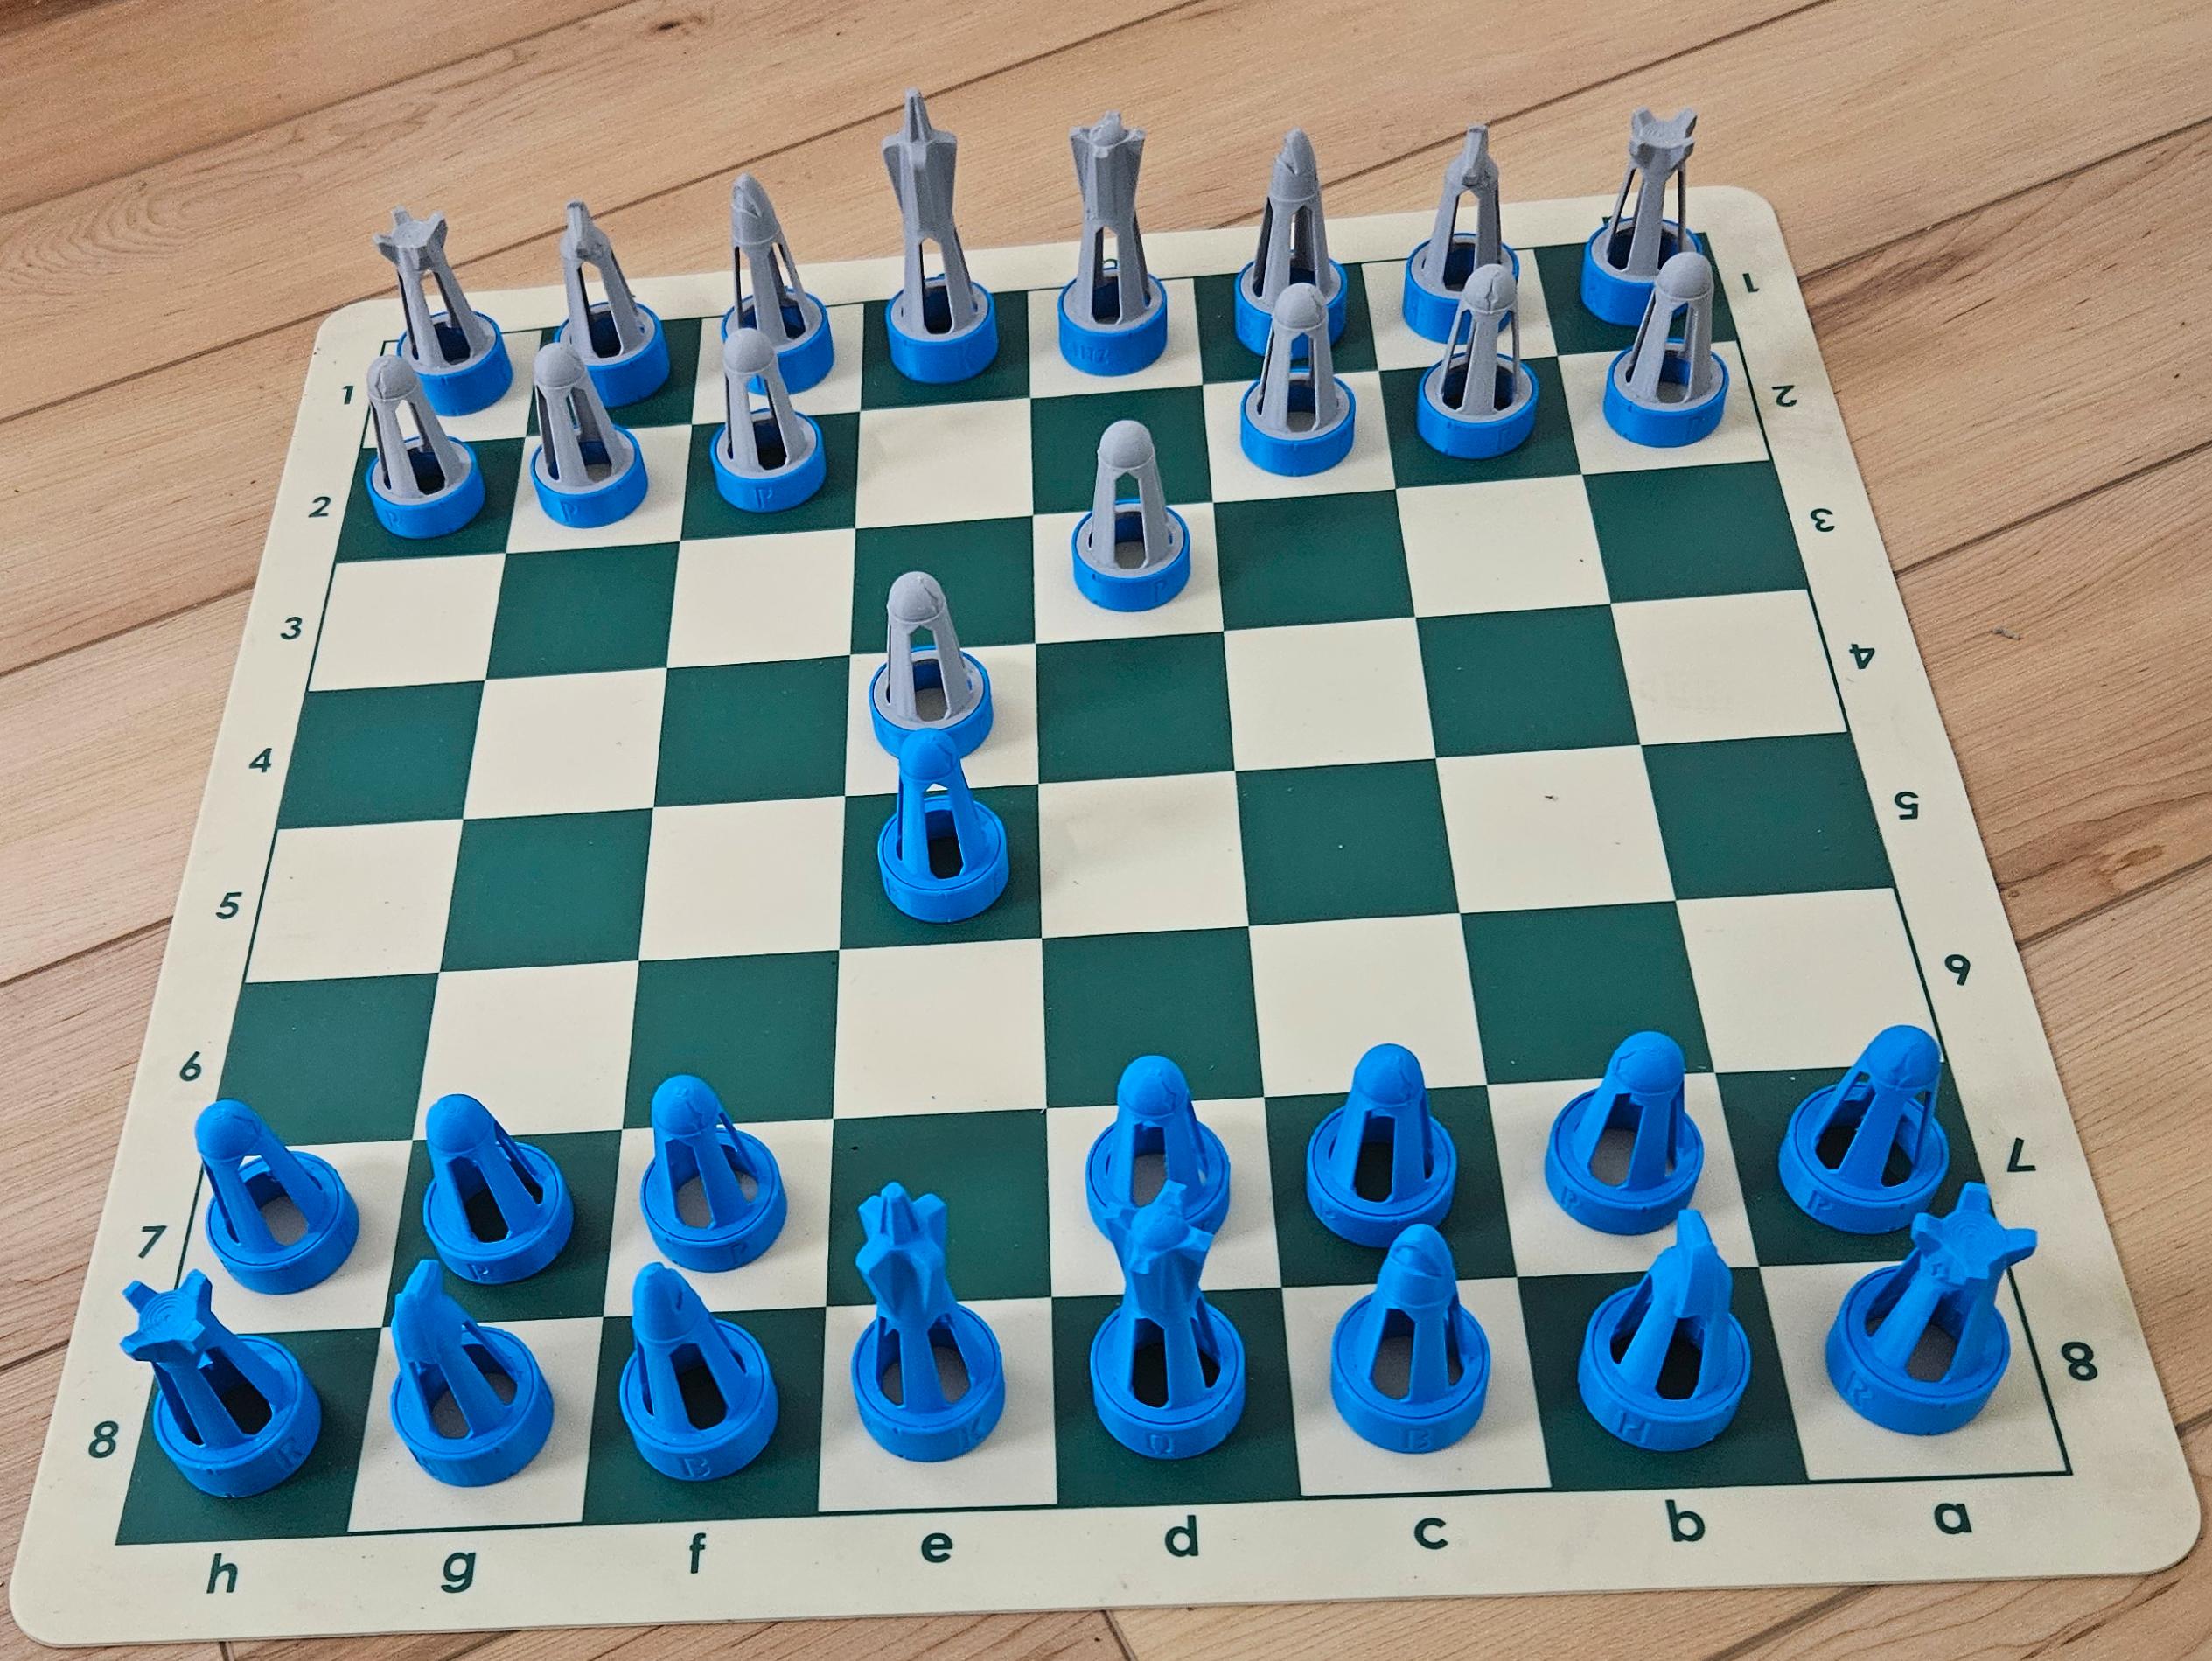
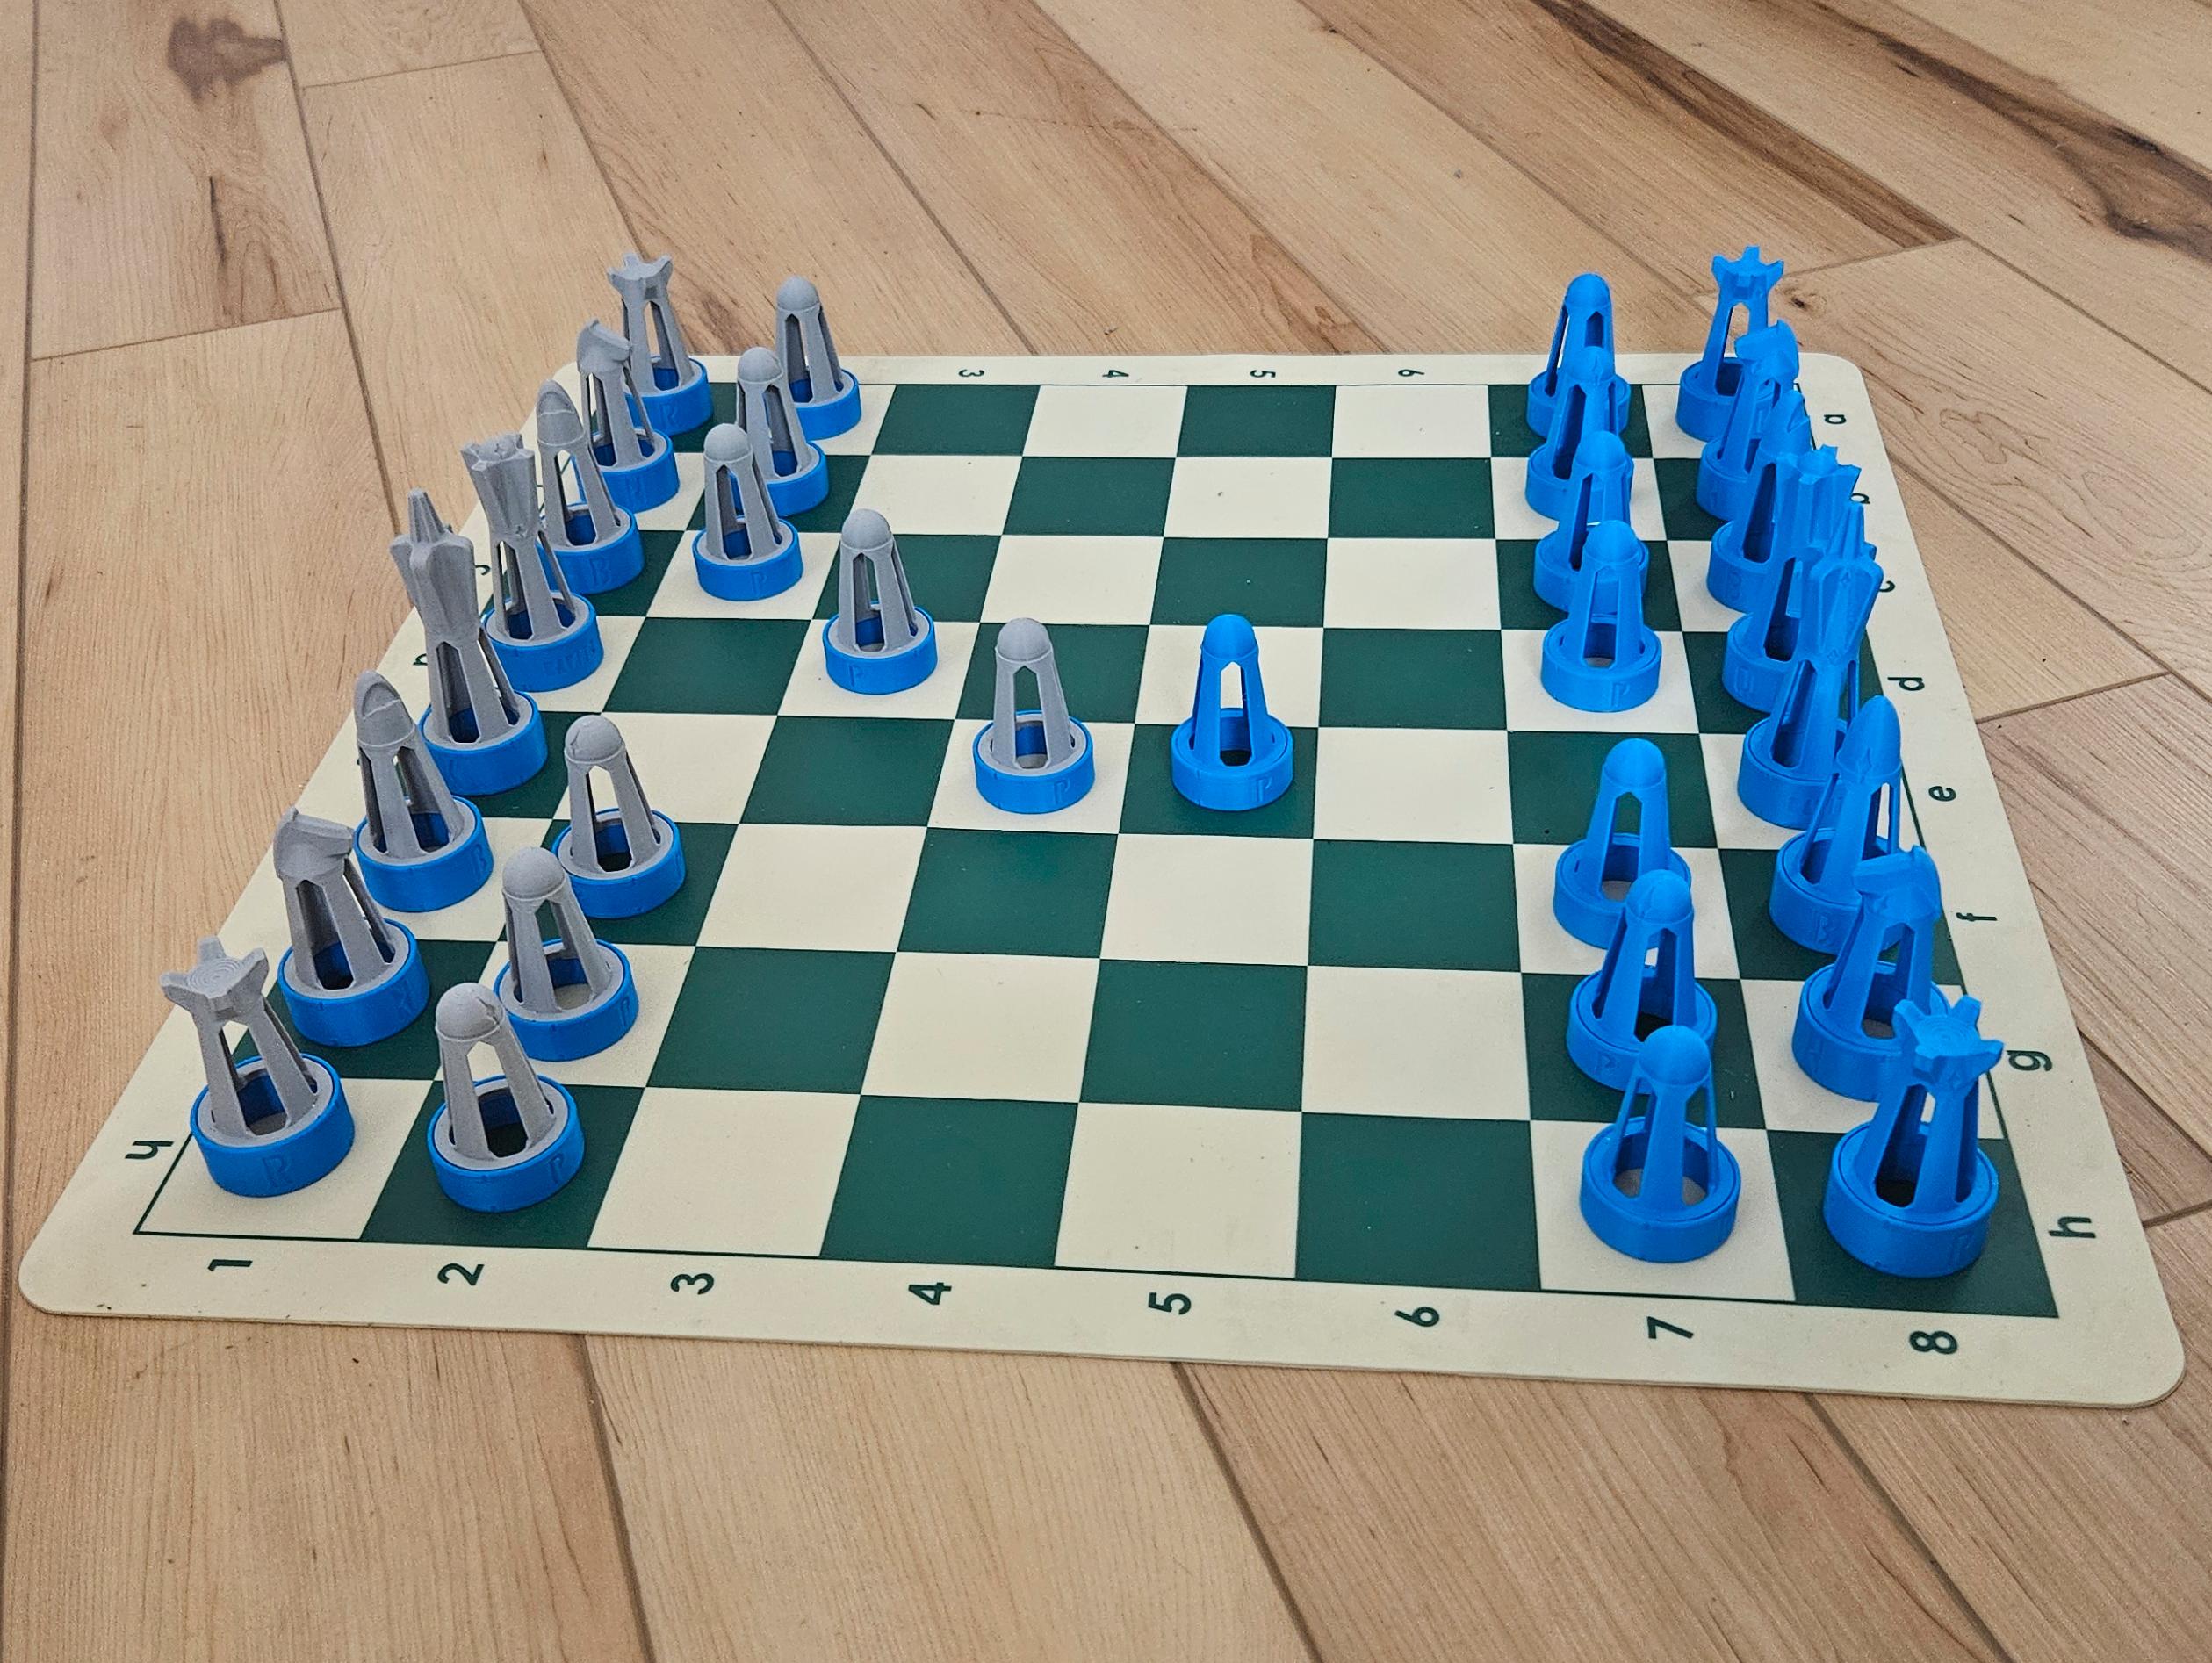
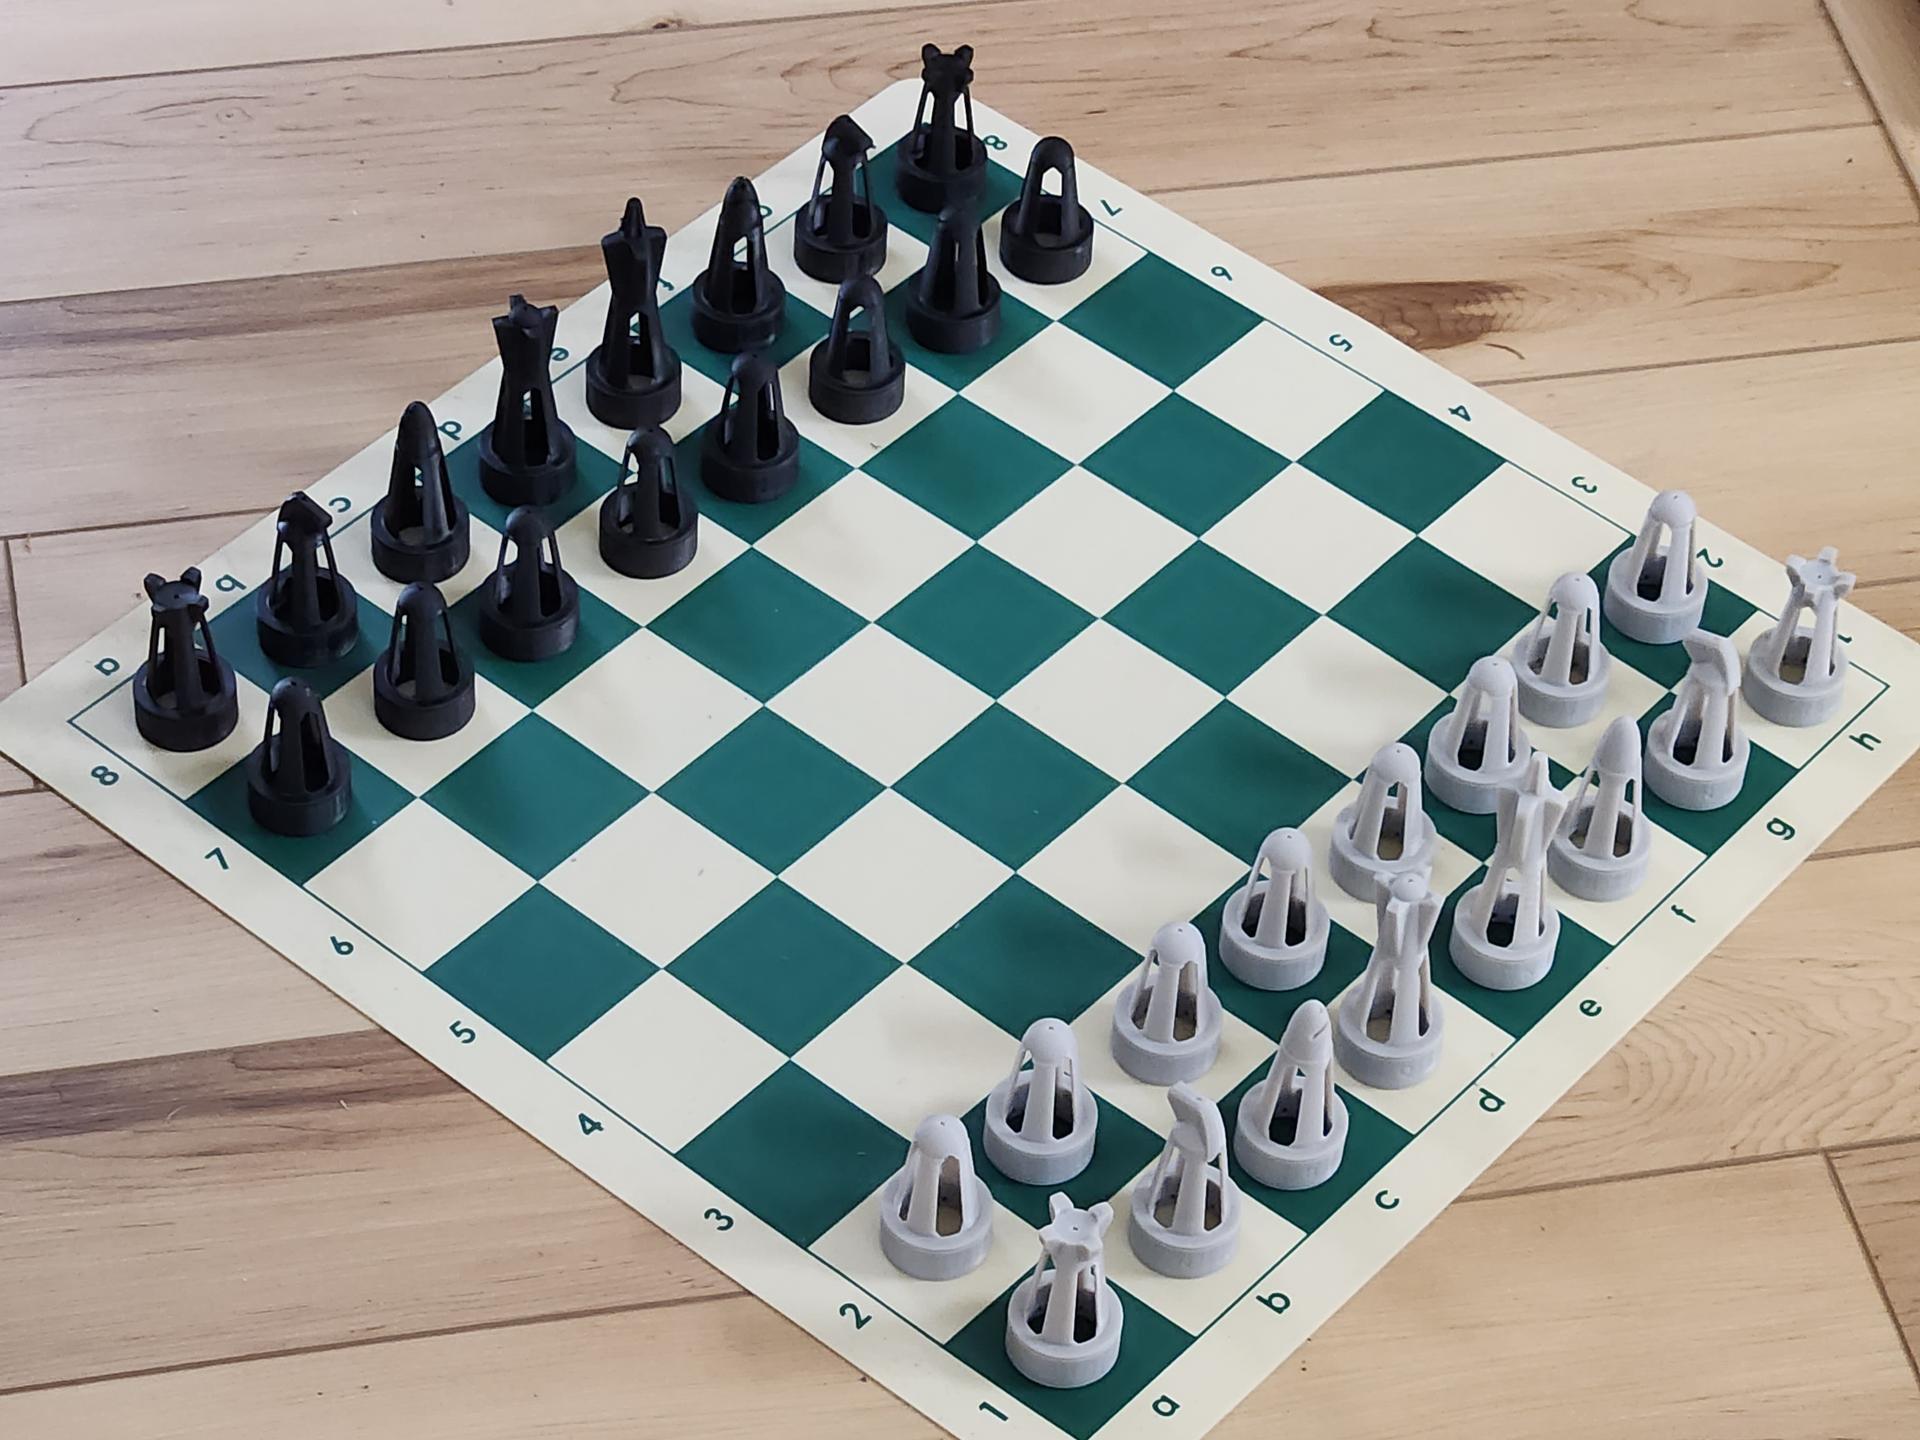
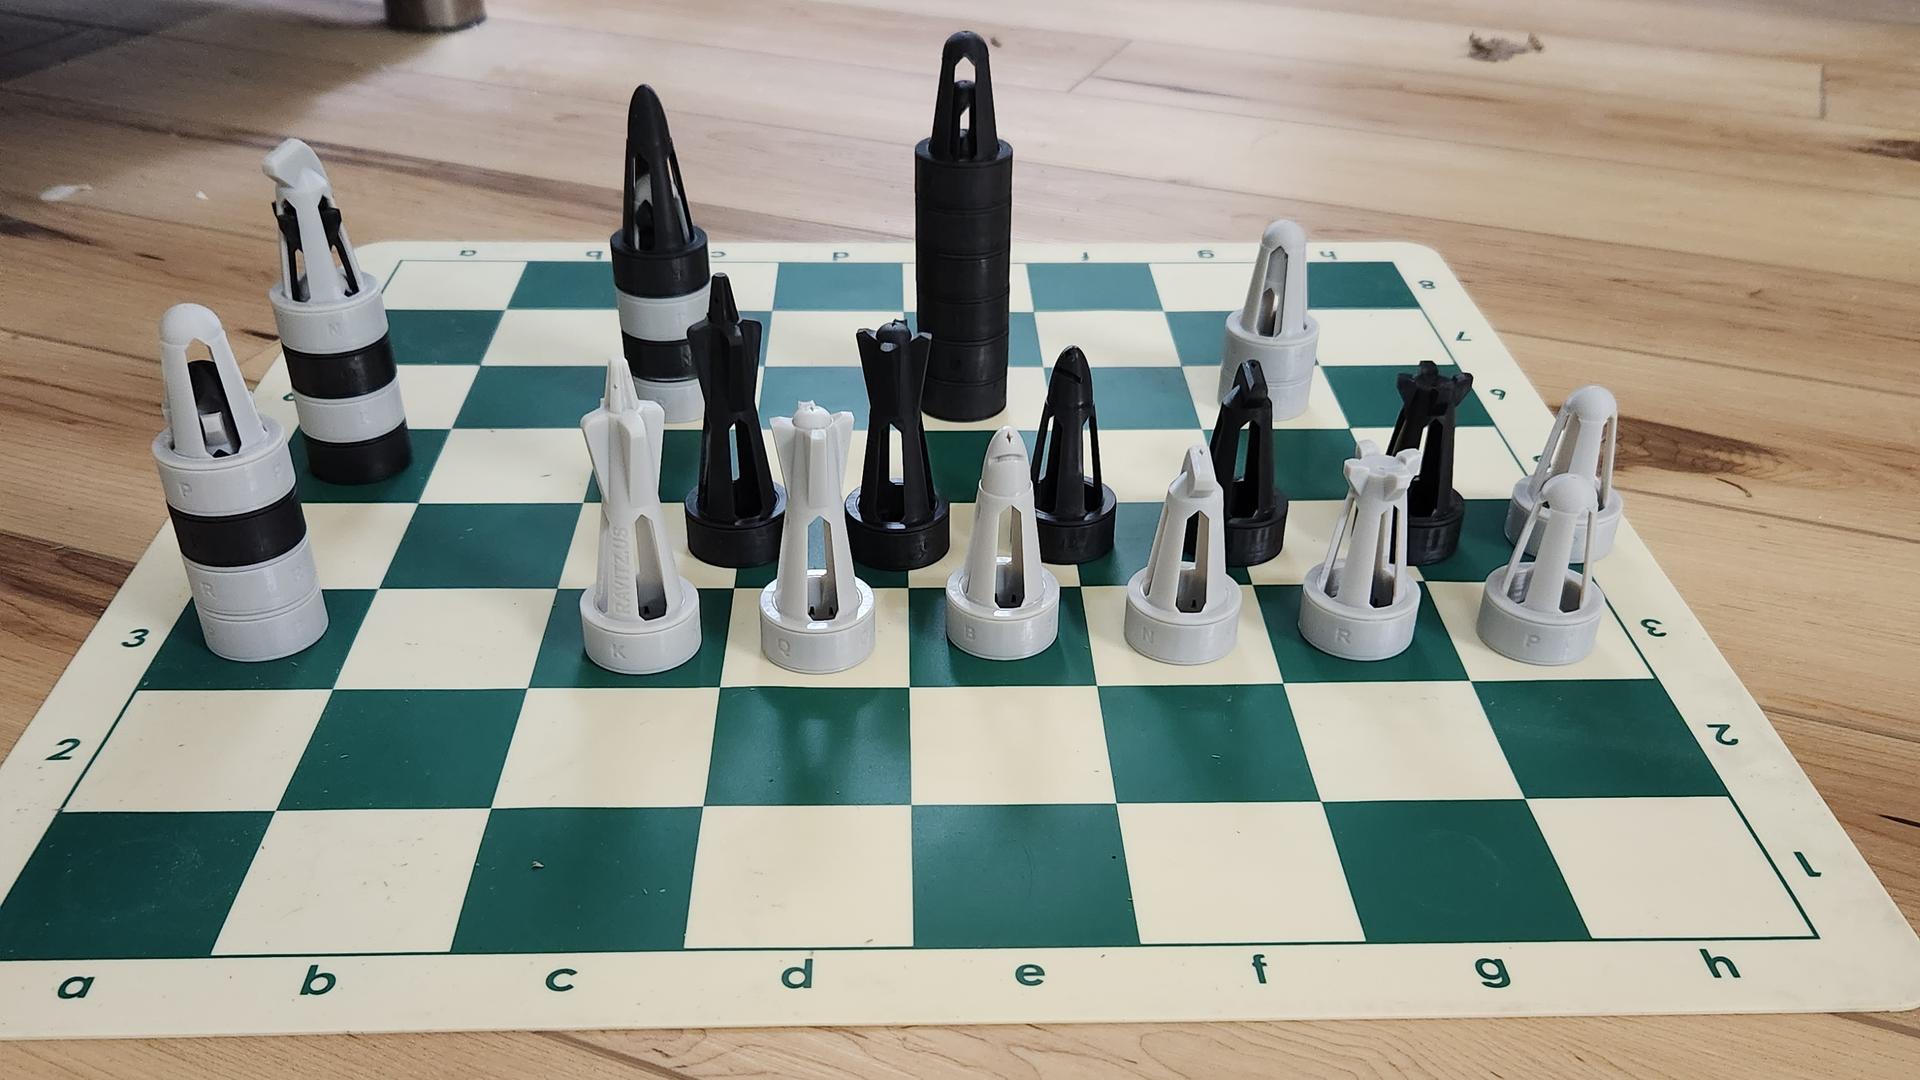
Stacking Chess Pieces
Latest Files |
Photos |
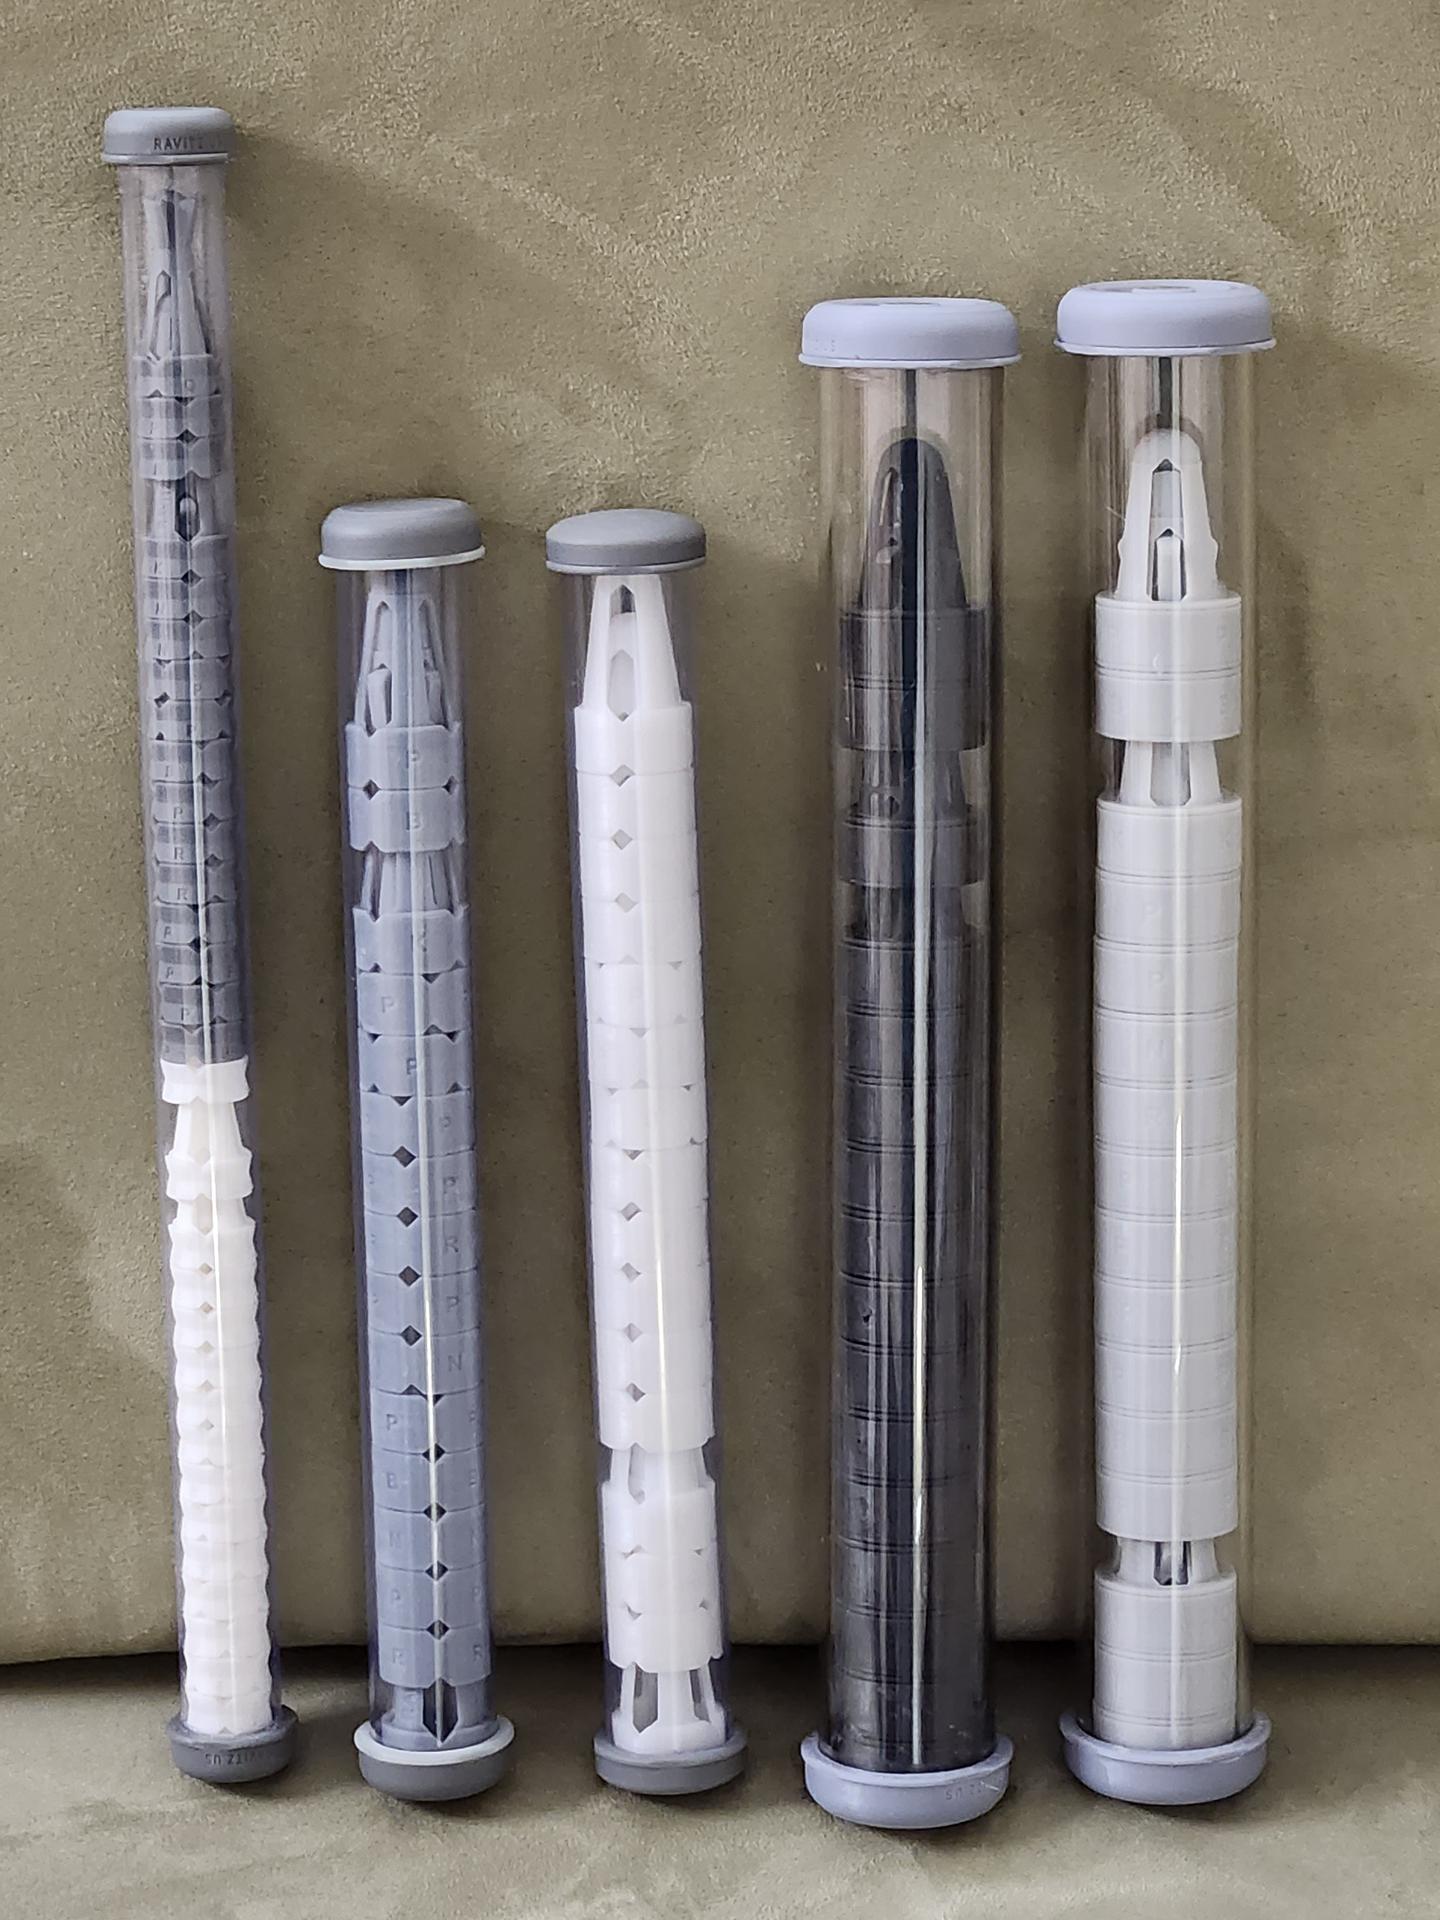
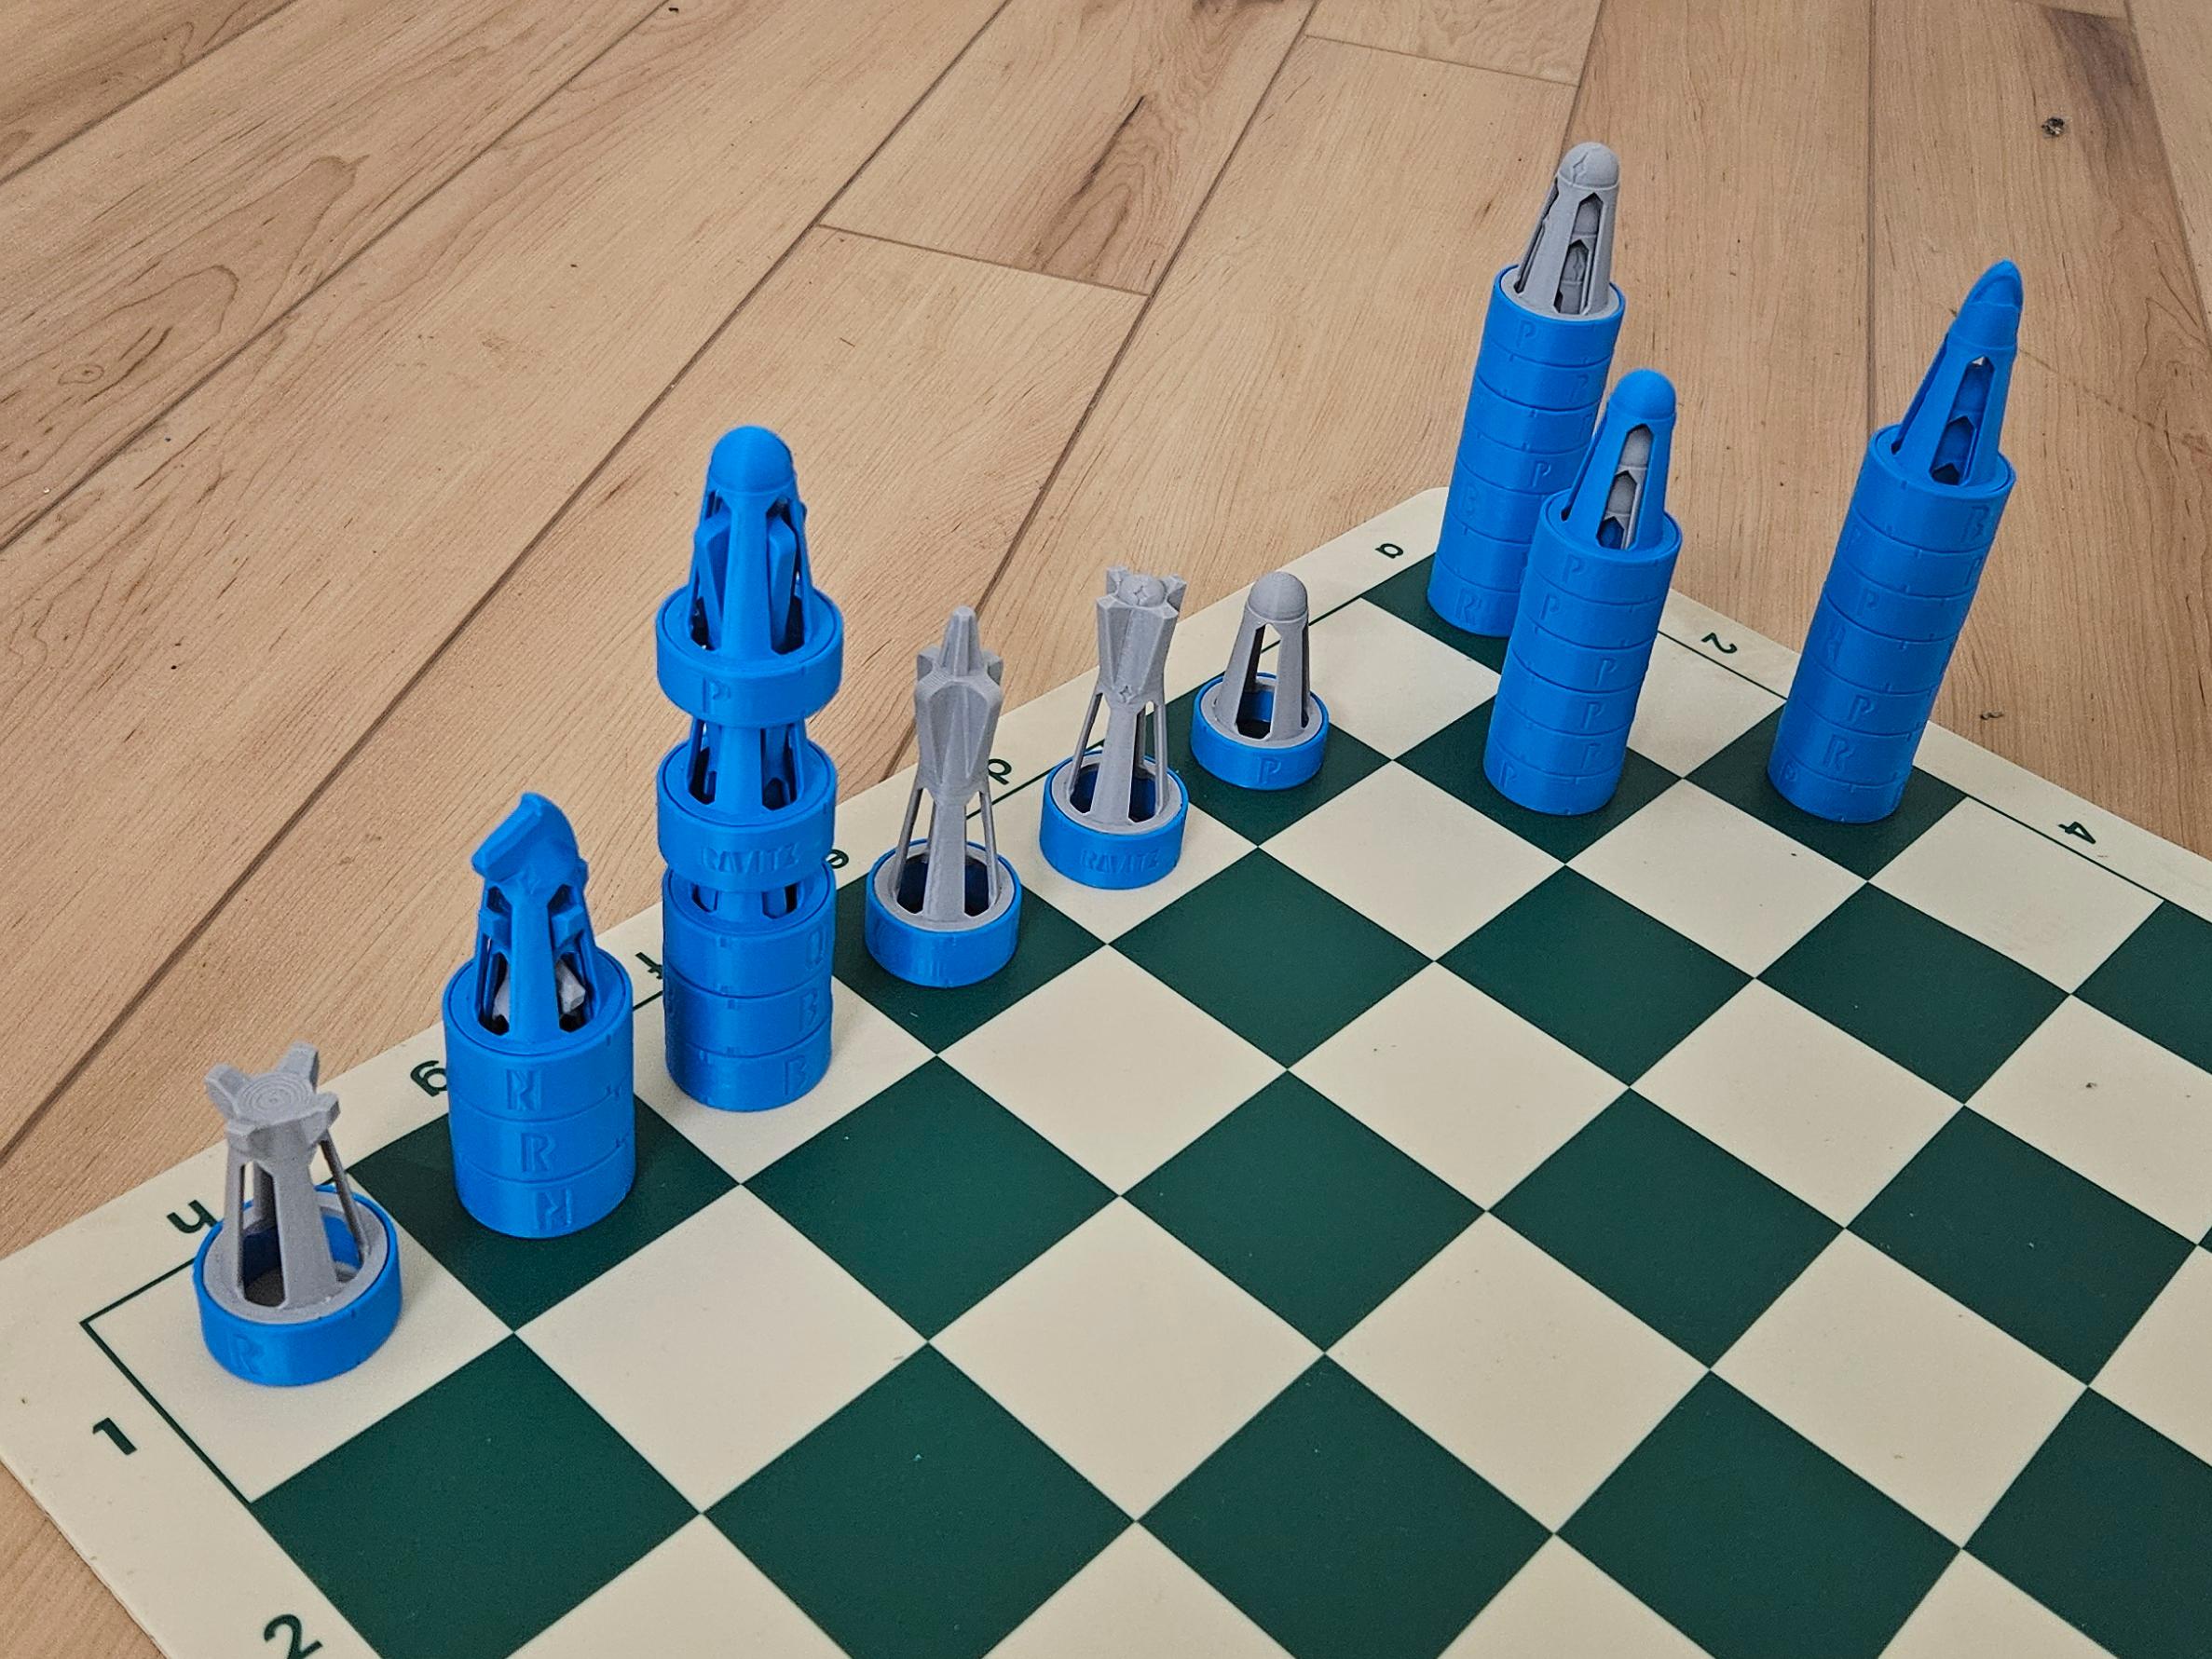
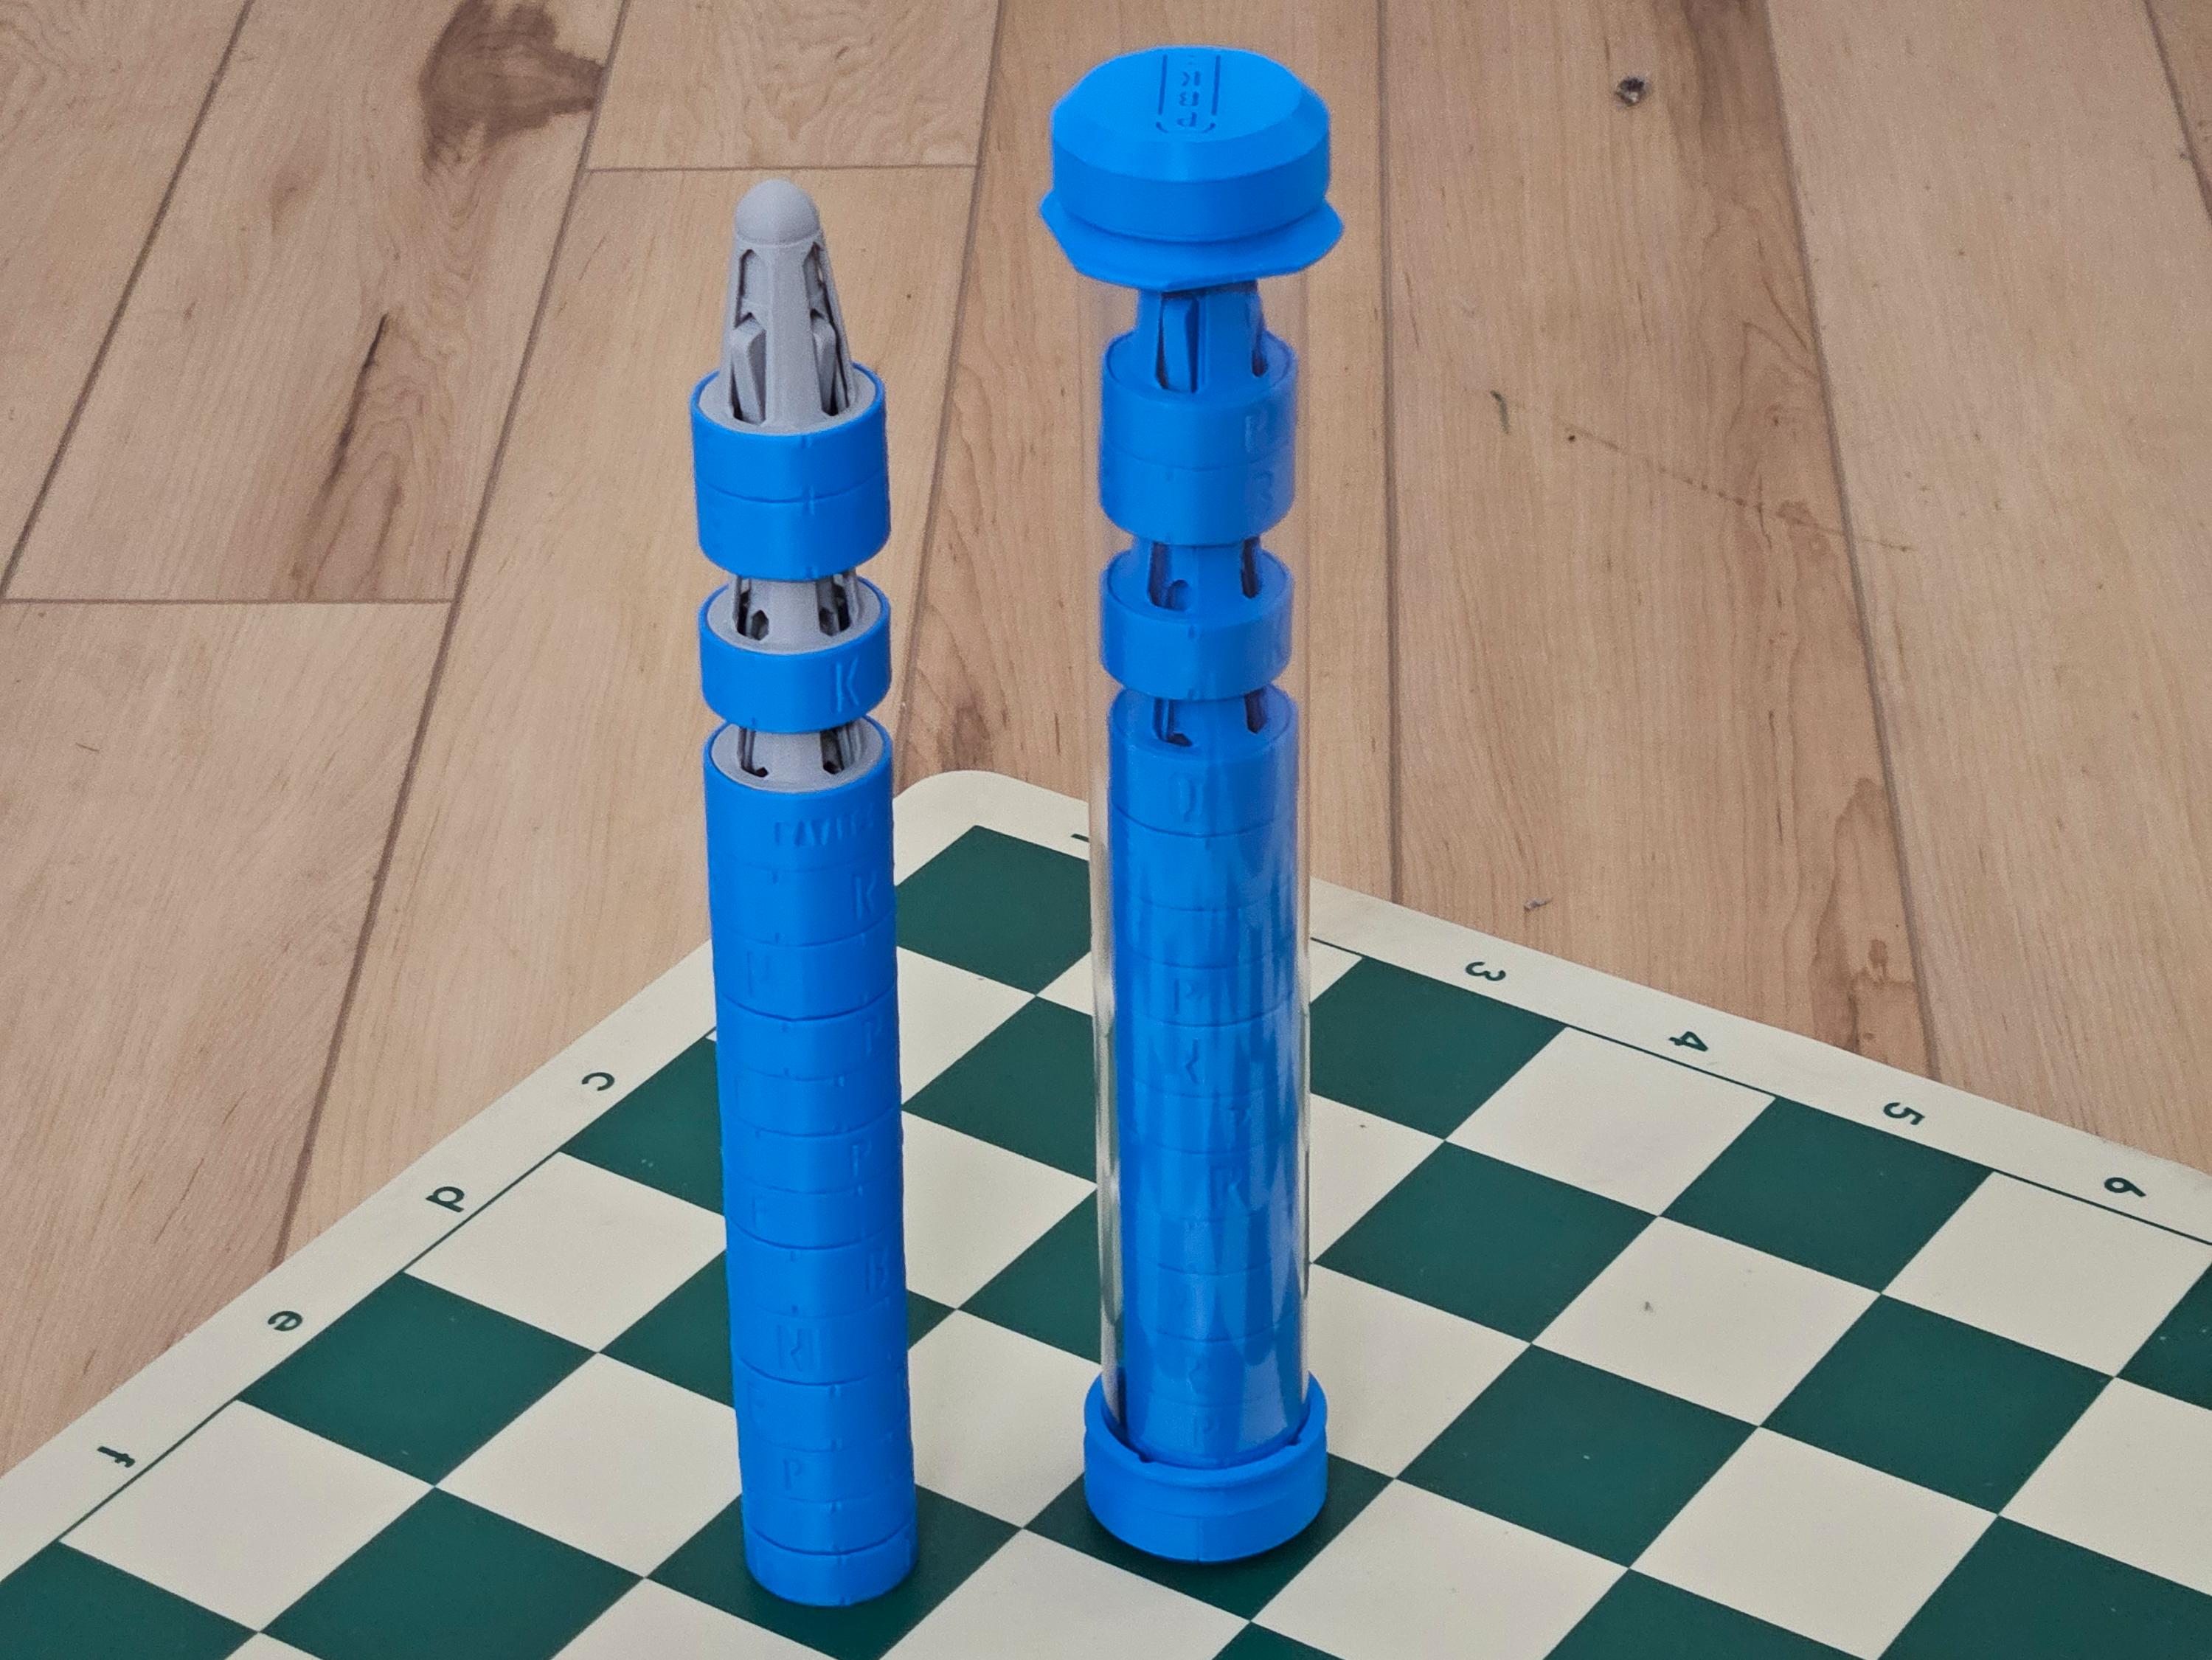
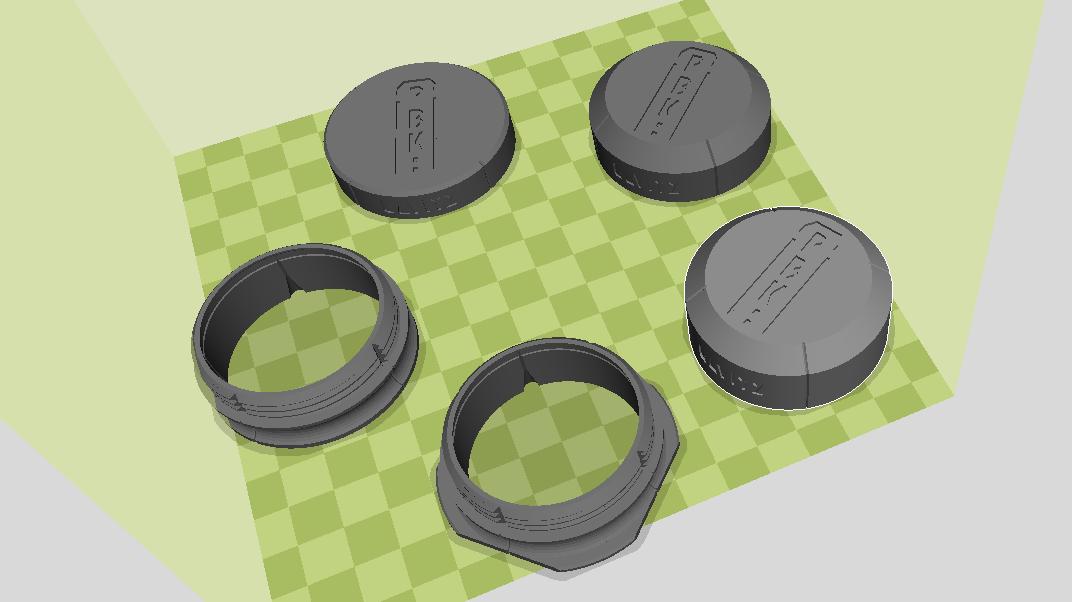
Storage Tube |
Old Files
This page is for distribution of my chess pieces via 3D print file (STL). The files are free for printing for personal use.
contact - caryravitz_at_gmail.com (replace _at_ with @)
www.ravitz.us
Last modified 8:03 PM, 18 Feb 2025 - File size 12K - Count 13654 - sitemap - robots
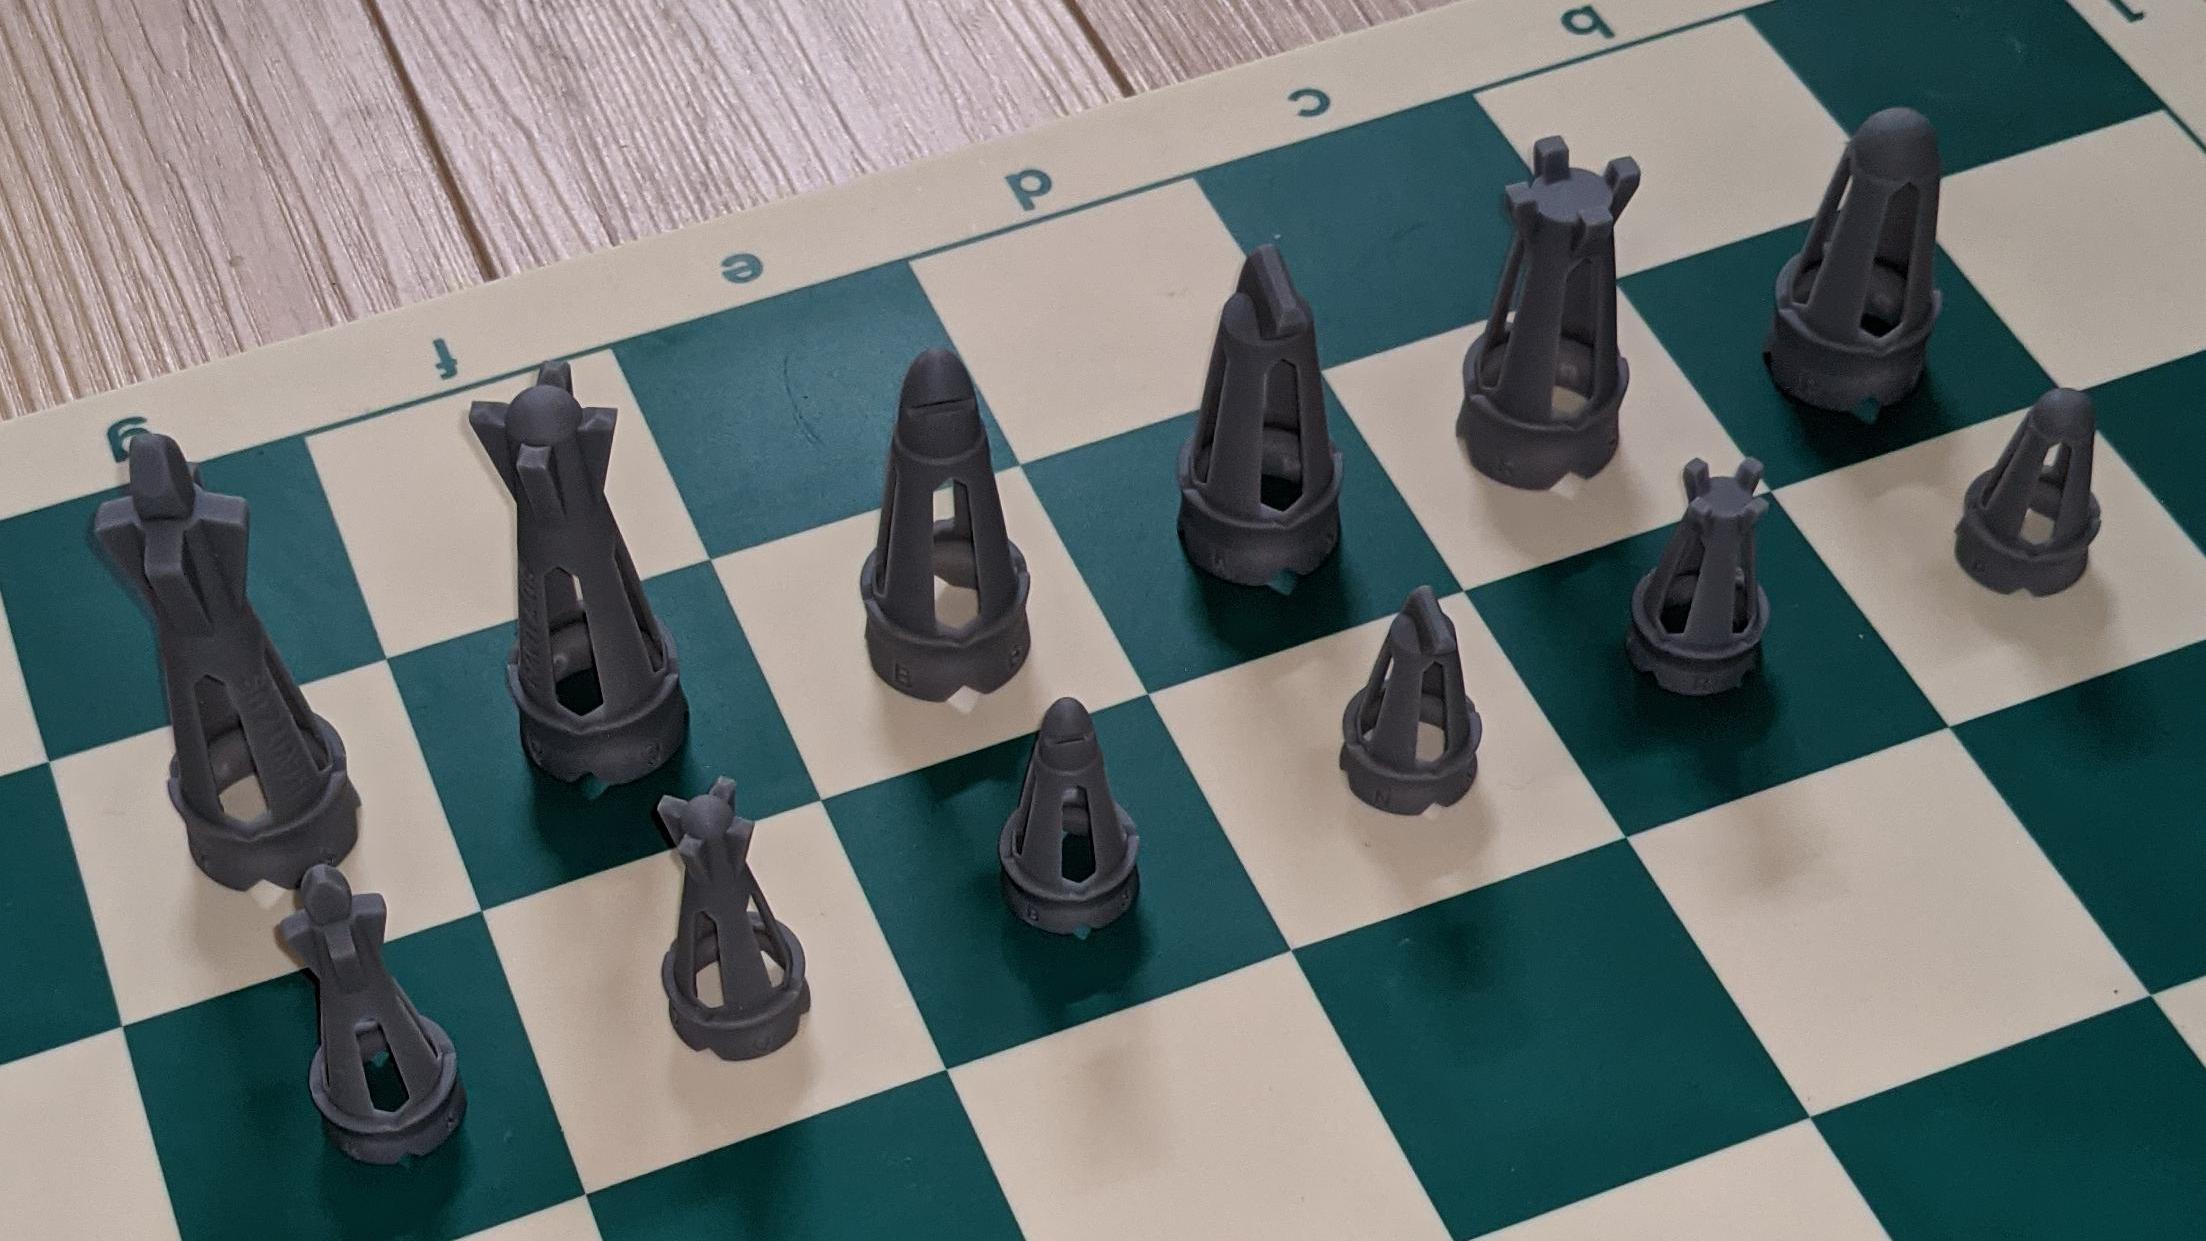
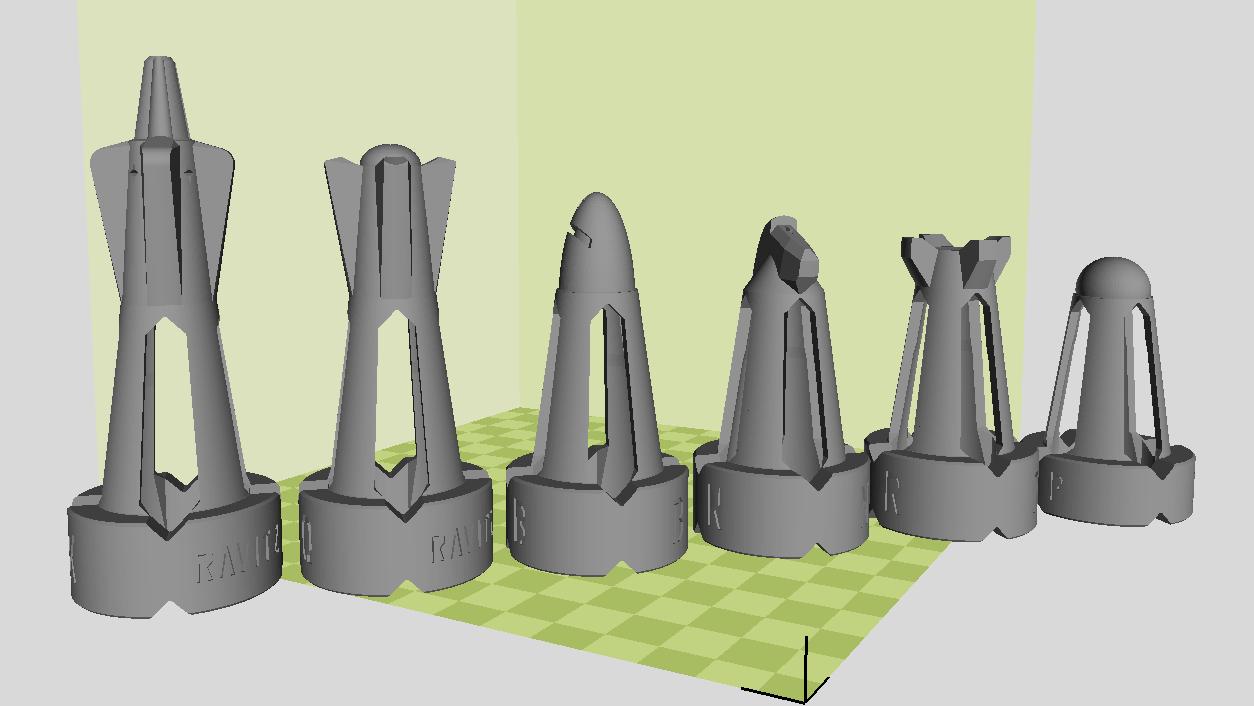
These chess pieces were designed by Cary Ravitz, 2021..2024. The pieces stack in any order. Stacking on top of the king or queen takes extra space.
I am currently publishing only STL 3D print files (generated by OpenSCAD from a SCAD file). There are designs optimized for resin printers and FDM (thermoplastic filament) printers. No supports are needed - horizontal overhangs max .5mm, angled overhangs minimum of 45 degrees, no bridges. The ZIP files include STL files with just the models and the models with my rafts.
Since I took these photos, I have revised the pieces a bit.
resin, small - 2024-04-21
resin, large - 2024-04-14
resin, weighted - 2024-04-14
resin, extras - 2024-04-21
FDM, small - 2024-04-14
FDM, large - 2024-04-14
FDM, weighted - 2024-04-14
FDM, extras - 2024-04-21
The large pieces have a 3.75 inch tall king. The small pieces have 2.25 inch king.
The short pawn (large and weighted model only) is the same height as the regular pawn but the base is 3.3mm thinner. This makes a 16 piece stack almost an inch shorter. It has slightly thinner walls than the other pieces. I have not had any printing or stacking problems with this.
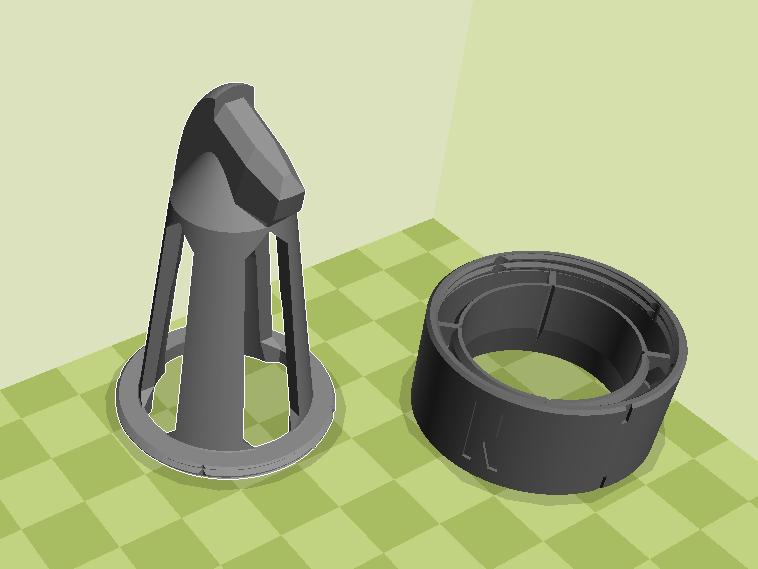
The weighted models are printed in two pieces, base and top. The base has cavities that hold lead shot - #7.5 (2.4 mm), but #6 (2.8 mm) will fit. I prefer copper plated shot to avoid handling lead. Tungsten is 70% heavier than lead but a lot more expensive. Print the base and the top of each piece, fill the cavities, staying below the threads, then screw on the top. Some of the shot will be a bit oversized but will fit into the cavity at the notch in the threads. I transfer my shot into a zip up freezer bag, inside another zip up freezer bag. I load the shot into the base in a bowl that catches the stray shot, and return it to my bag of shot.
The resin models are oversized by 0.9% to account for cure shrinkage. The four point star cutouts and holes at the bottom of the weight cavities are there to drain uncured resin and allow alchohol to flow through the interior. My rafts were developed to be easy to remove by (gloved) hand. This reduces the uncured resin that gets into the wash. 100% fill, no supports.
For the FDM models, the four pointed stars are used to hide seams. I use a .4 mm nozzle with .2 mm layers, 100% fill, 20 perimeters, seam position aligned, no rafts or supports.
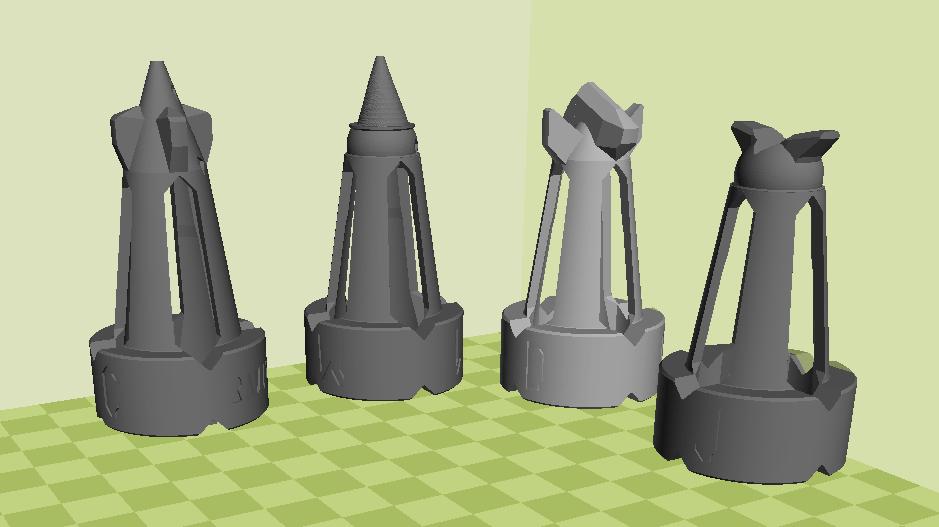
The extras are four models for those who like to experiment with chess variations - prince, wizard, dragon, and jester.
Very Small Changes - Untested
resin, small - 2024-05-08
resin, large - 2024-05-08
resin, weighted - 2024-05-08
resin, extras - 2024-05-08
FDM, small - 2024-05-08
FDM, large - 2024-05-08
FDM, weighted - 2024-05-08
FDM, extras - 2024-05-08
FDM, large, short pawn
resin, large, short pawn
FDM, large, extras - prince, wizard, dragon, and jester
FDM, large, weighted knight
FDM, weighted pieces, short pawn
resin, weighted pieces, old style
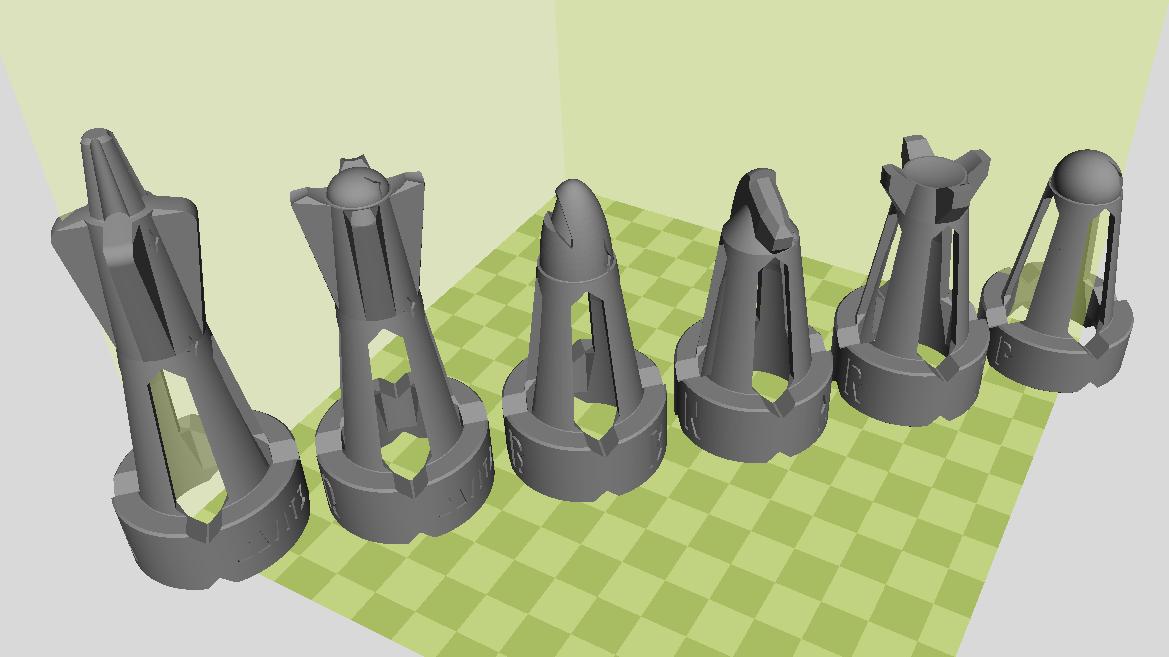
These are designed for FDM printers and do not need any support or rafts. The extra cuts in the threads let the slicer minimize seams - this is important to make the caps work well.
Inner diameters are 1 inch for the small models and 1.5 for the larger models. You can scale in the slicer to accommodate variations in tube outer diameter.
The latest models include four glue insertion spots at the bottom of the tube piece, for liquid glue. There is a band at other end that ensures that the contact point with the tube is completely on the tube even if the top is cut slightly off square. It also limits liquid glue wicking. Slide the pieces onto the tube, square them by ensuring that the tube stands vertically, then apply the liquid glue.
When storing the chess pieces, stack them with a bishop on top of the king and a pawn on top of that bishop - this minimizes the total stack height.
There are four cap lengths with extra length 0, .25, .5, .75 inch.
For a 12 inch tube, large or weighted pieces, short pawn, use the .25
longer cap (cap1). For a 12 inch tube, large or weighted pieces, regular
pawn, use the .75 longer cap (cap3).